


 687 / 759

Technical Hotline
+44 (0)1268 563720
687
FLOOR SYSTEMS
SCREEDED
Onix Plus™ Technical
Onix Plus
™
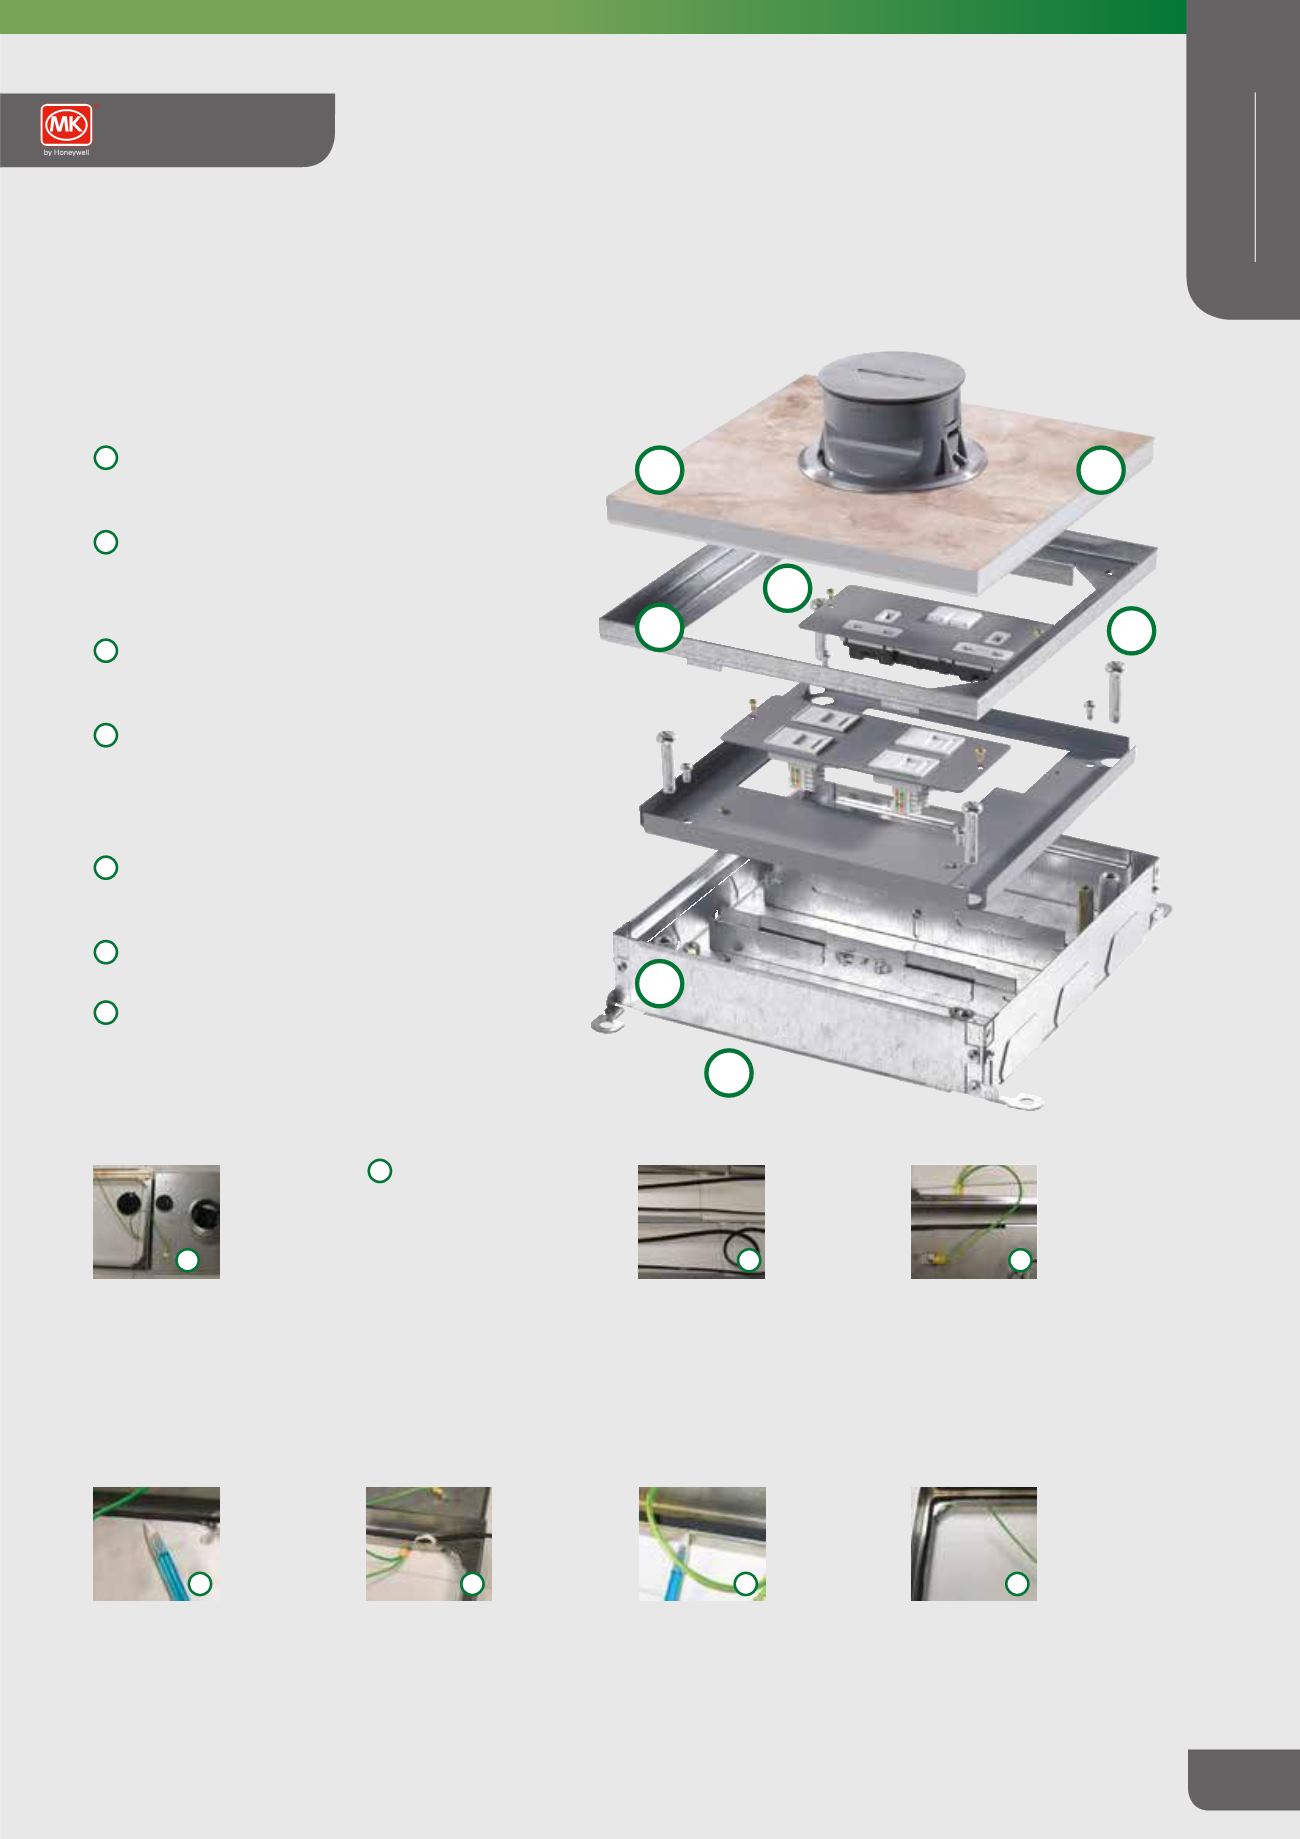
Floorboxes and Power Grommets
Installation of Snorkel Lid
1
The base unit is fixed to the slab and the ducts or
conduits are fed into the base using the appropriate
side entry plate.
2
The disposable screed cover is fitted to prevent the
ingress of screed through the top. All areas of the box
which may be susceptible to screed ingress should be
sealed.
3
The Lid frame should be assembled and fitted after
the disposable screed lid has been removed and the
gasket can now be fitted.
4
The lid is supplied with an earth lead and must be
bonded to earth for all power applications. As the lid
is only installed when the floor covering is laid there
is less chance the surface finish of the lid will be
damaged.
5
A floor covering insert is required for the lid recess.
The dimensions for the insert are given in the Lid
Recess Dimensions section see page 685.
6
Sealing compounds are required for products that are
for use in wet wash environments.
7
The bases are supplied with 35mm wiring space,
but with the option to reduce to 25mm or increase to
45mm with the Cuba-1 height adjustment kit.
How to Install the Gasket
1
2
4
5
3
7
6
Identify the
gaskets
The wider
gasket is
used in the
frame and the narrower gasket
is used on the lid. The gaskets
are designed to sit next to one
another, not one on top of the
other.
Ensure gasket is clean
Ensure both lid and frame are
dry, clean and free from oily
deposits and debris such as
grout and screed.
If replacing the gaskets ensure
all traces of existing gasket
and adhesive have been
removed. An alcohol wipe
will aid the removal of the
adhesive backing.
Ensure
gasket is
straight
The gasket
must have
no twists in it. Any twists will
result in the gasket not fitting
and functioning correctly.
2
Fitting lid
gasket
Start the lid
gasket on the
underside of
the lid as close to the outer edge
as possible, approximately half
way along the length. Ensure
the gasket runs underneath the
Earth bonding cable. Do not run
the gasket past the first corner
at this stage.
3
7
1
3
4
Identify the
gaskets
Butt the
other end of
the gasket to
the start to ensure a good join.
This also ensures the gasket is
not stretched unduly.
Continue fitting the gasket
around the edge of the lid
keeping the corners as close to
90° as possible, until complete.
5
Fitting
frame
gasket
Start the
frame gasket
as close to the inner edge as
possible, approximately half
way along the length. Ensure
the gasket runs underneath
the Earth bonding cable. Do
not run the gasket past the first
corner at this stage.
6
Fitting
frame
gasket
Butt the end
of the gasket
to the start to ensure a good
join. This also ensures the
gasket is not stretched unduly.
7
Fitting
frame
gasket
Continue
fitting gasket
around the inner edge of the
frame, ensuring the gasket
runs to the outside of the
screw hole, until complete.
8