


 626 / 759

 mkelectric.co.uk
626
CABLE MANAGEMENT
PERIMETER AND
DISTRIBUTION
Prestige 2Com
Technical
34mm
13mm
1
2
3
5
Planning the Installation
It is important to spend some time planning the installation, before
starting. Time spent on planning the layout at this stage can
avoid mistakes later on. The installation is designed for a non-
conductive substrate, if you have any queries please contact: MK
Technical Sales Service Department. Telephone 01268 563720.
1.
Surface to which the trunking is to be installed should be flat
and prepared for decorating.
2.
Establish the layout of the trunking run with particular attention
to the following: -
a.
Changes in direction of the trunking.
b.
The position of any feeds to or from the system.
c.
The position of any connections with existing trunking/
wiring systems.
d.
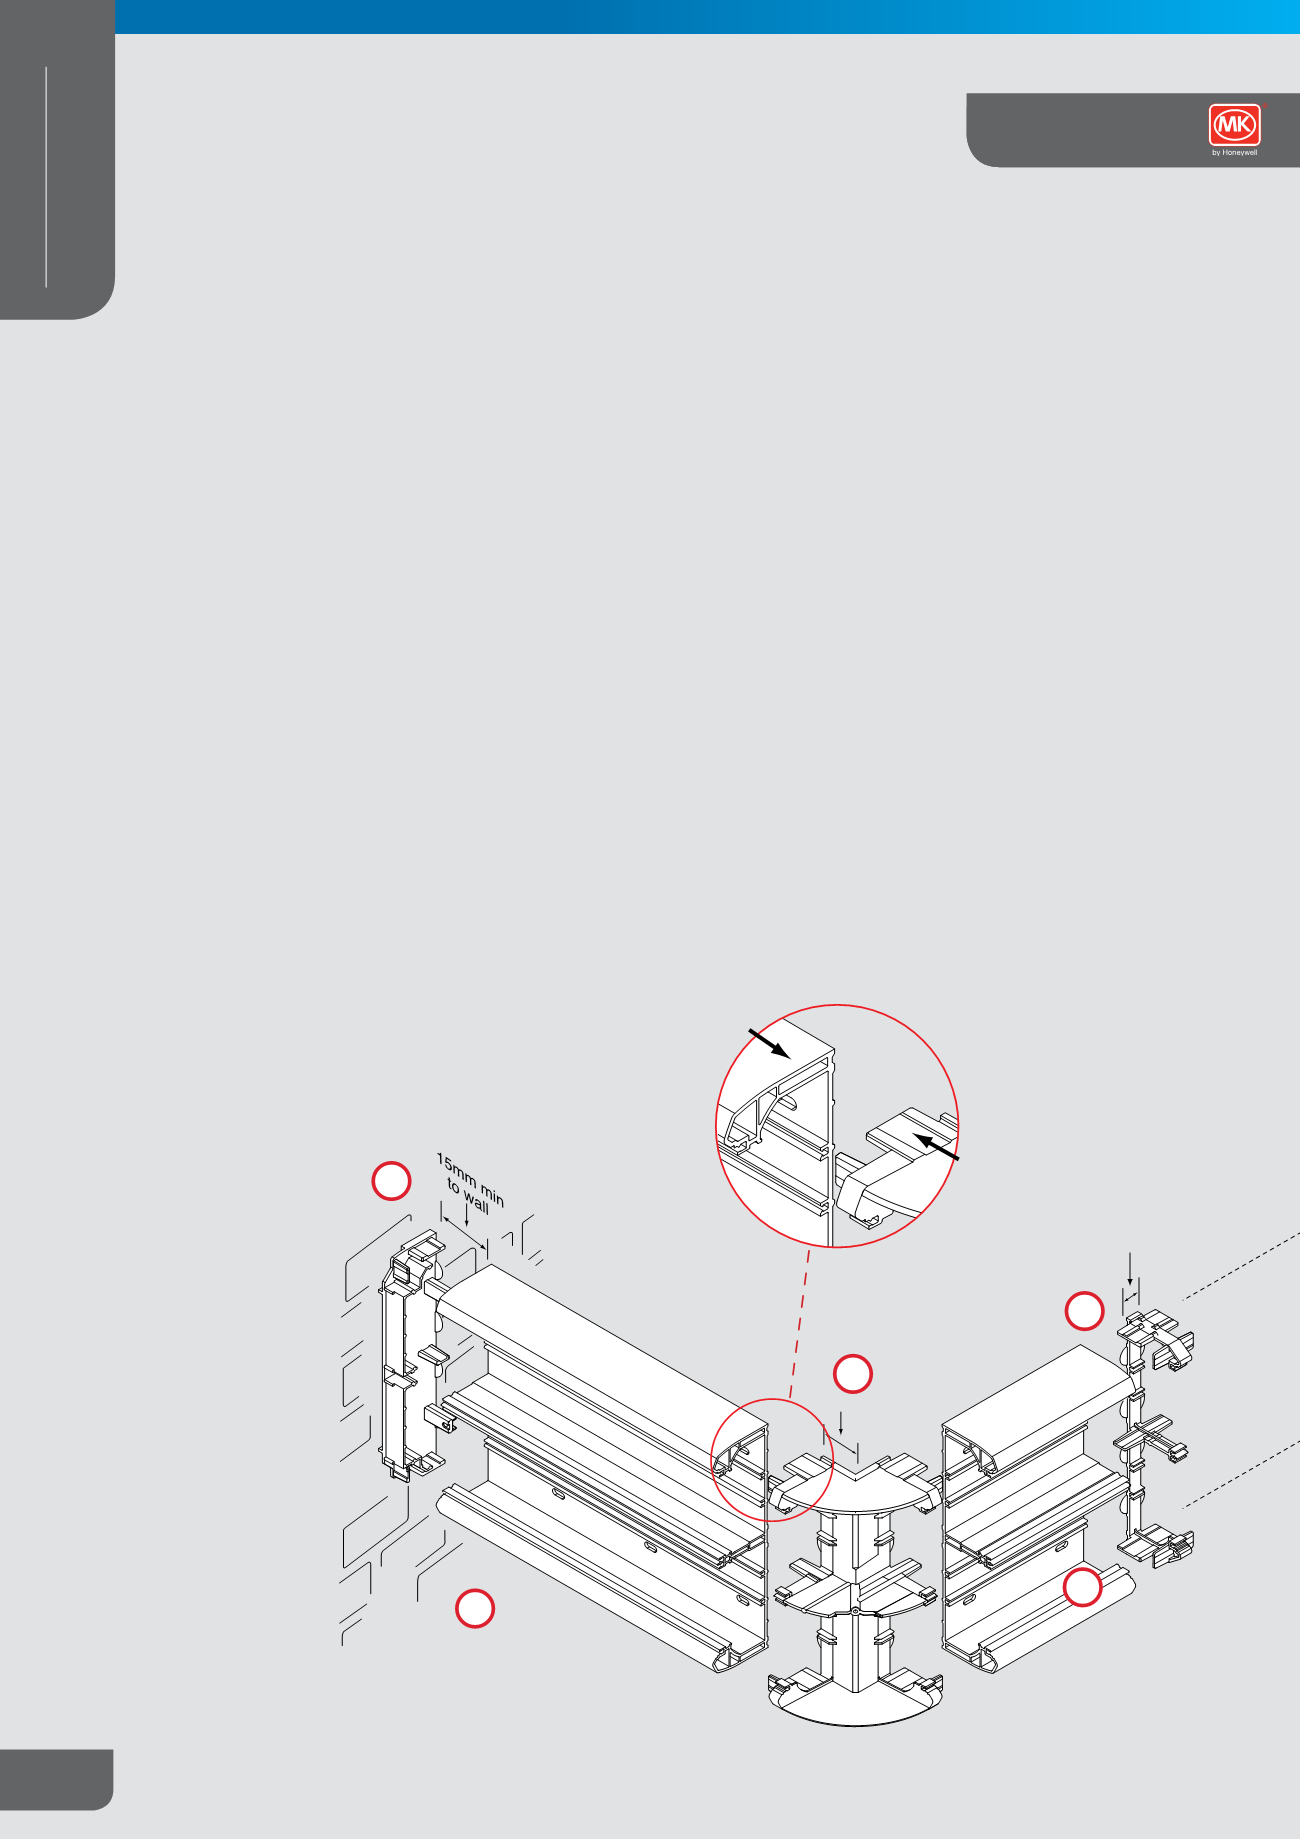
Allow for minimum distances between corners, couplers,
screw fixings, angles and tees (please see individual
technical sections for details).
e.
When installing at skirting level, ensure room is also
allowed for future floor coverings to be fitted below
trunking.
GENERAL INSTALLATION GUIDELINES
TOOLS AND SUNDRIES REQUIRED FOR INSTALLATION:
1
.
Fine toothed tenon saw or a hacksaw with a 32 – 26 TPI
blade for cutting the trunking, or preferably a circular saw
with a 350mm diameter fine tungsten tipped blade
(100T approx.)
2.
All purpose knife or fine file for trimming of trunking
3.
Spirit level, Plumb Bob and chalk line
4.
A range of screwdrivers (flat or cross point) to suit fixing
screws and Earth Carrier Connectors
5.
A 5.5mm Ø drill bit and No.8 Round head or Pan head screws
with suitable washers to secure the trunking.
6.
Soft faced mallet to aid lid fitting
4
Data Trunking System
Installation Guide