


 660 / 759

100mm
1.25 to 1.50m
100mm
Industrial Trunking
General notes
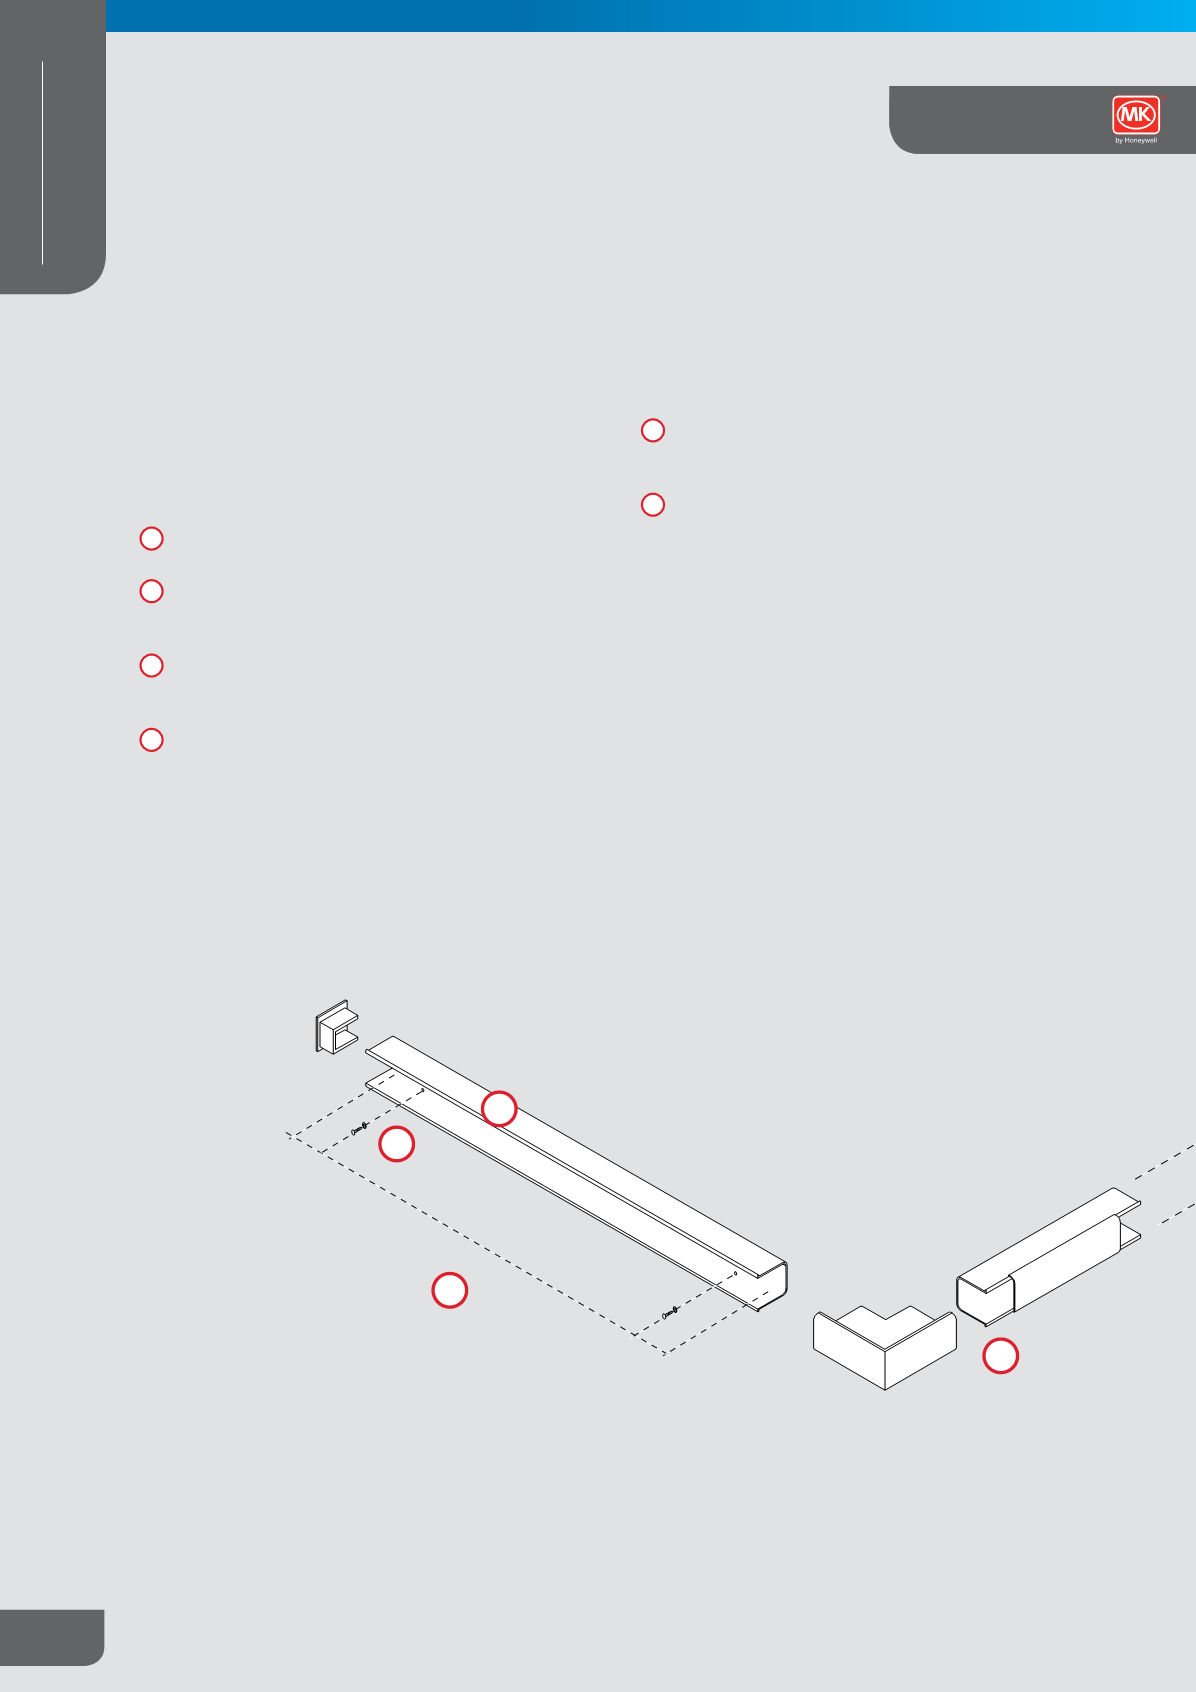
Prior to installation strike a line of trunking using a plumb and
chalk line for vertical, and spirit levels for horizontal runs.
Fixing
1
Fix trunking with screws. It is essential that the hole in the
trunking is considerably oversized to allow for expansion.
2
Washers should be used under the head of the screw. The
screw should not be tightened to its full extent to allow for
movement.
3
For suspended trunking it is advisable to provide fixings
every 1.25 m to 1.5 m and a maximum of 100mm either side
of coupling.
4
Trunking and lid joints should be staggered to increase the
strength of couplings.
Installation Guide
1
2
3
4
Fixing lids
5
Fix lid by sliding it onto the trunking at one end, aligning it to
the run of trunking and then curving the cover at the same
time as pressing the continuous clip into the trunking gap.
6
To remove lid grasp the trunking firmly at one end and pull in
peeling motion so that the cover is gradually freed along its
whole length.
mkelectric.co.uk660
CABLE MANAGEMENT
PERIMETER AND
DISTRIBUTION
Ega Industrial
Technical