


 308 / 327

Tel
+44 (0)1424 856600
Fax
+44 (0)1424 856611
Technical Hotline
+44 (0)1424 856688
TECHNICAL INFORMATION
Technical information
308 |
Conduit systems
522-08-03. The radius of every bend
in a wiring system shall be such that
conductors and cables shall not suffer
damage.
Cold bending 20-25mm conduit
Cold bending may be carried out on all
conduit sizes up to 25mm in diameter
using the correct size and gauge of
bending spring.
• Heavy gauge spring is colour-banded
green at the tip.
• Light gauge spring is colour-banded
white at the tip. Springs are not
interchangeable.
• Make sure springs are not damaged
in any way as this can fracture or kink
the conduit making removal of the
spring difficult.
• In cold weather, warm the conduit by
rubbing with a rag before bending.
To bend the conduit:
• Insert the spring to the desired
position, grip the conduit on either
side of bend and bring slowly
together to form the bend.
• Cold bending of 20mm and 25mm
conduit should be done with
correct / undamaged spring inserted
and bent over knee to initiate bend.
Spring should remain inserted until
the desired angle is achieved. (Under
no circumstance should bends be
increased or decreased without
correct spring inserted)
Failure to follow above procedure
could increase possibility of product
failure
• Make the bend more acute than
necessary to allow for PVC-U to
‘recover’ after bending.
• To remove the spring, twist anti-
clockwise (to reduce its diameter)
whilst turning the conduit clockwise
and gently pulling the conduit and
the spring apart.
• If spring fails to release, do not pull
too hard or damage to the spring
may occur.
• Repeat the removal procedure until
they come apart.
• The conduit should then be fastened
into position to prevent further
‘recovery’ of the bend.
Hot bending
Hot bending should be carried out on
all conduit sizes over 25mm in
diameter using the correct size and
gauge of bending spring.
To bend the conduit:
• Insert the spring to the desired
position as described in ‘cold
bending’, gently heating conduit
with a hot air torch, hot water or by
other suitable means.
• Avoid direct application of flame to
the conduit. When the conduit is in
a pliable state, slowly bend around a
suitable former, holding in position
for about 1 minute until set.
• Remove the spring, twist anti-
clockwise (to reduce its diameter)
whilst turning the conduit clockwise
and gently pulling the conduit and
the spring apart.
• If the conduit is bent too fast or,
in the case of light gauge conduit,
across the knee, there is a risk of
damage to conduit and spring. Once
the bend has been made, it should
not be forced backwards but allowed
to ‘recover’ naturally.
Earthing
The properties of PVC-U make it an
all insulated system and the use of a
separate earth cable is essential.
Joint sealant
• Solvent cement MSC is a slow acting
solvent cement especially formulated
for watertight conduit fittings.
In accordance with COSHH
Regulations, details of our solvents are
entered in The National Poison Centre
computer records. Health & Safety data
sheets are available from our Technical
Team or on the technical page of
the Marshall-Tufflex website:
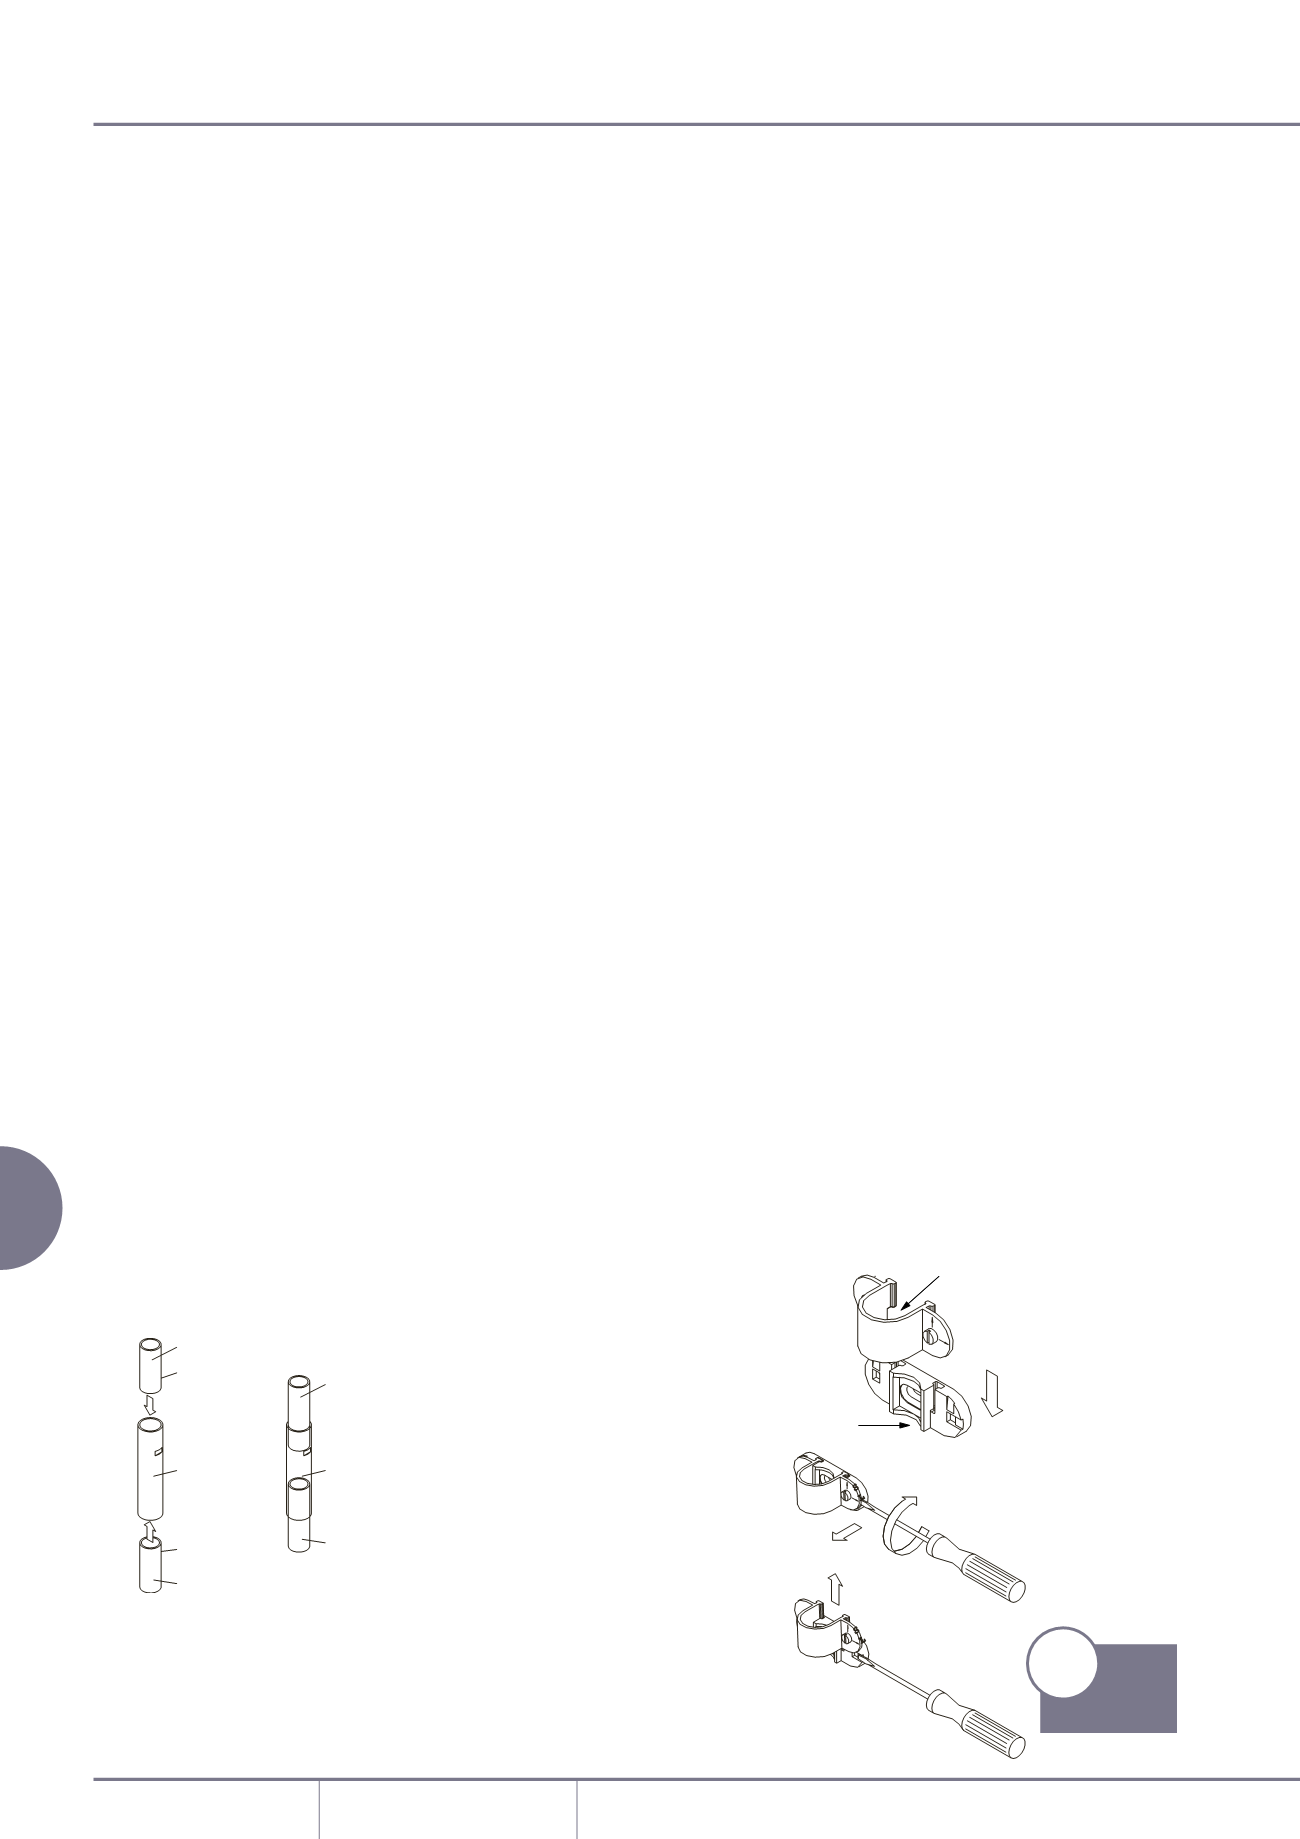
www.marshall-tufflex.comSpacer bar snap saddle
• Slide saddle into groove until it locks
into the spacer bar.
• To dismantle, insert 4mm blade
screwdriver into slot on side. Twist
screwdriver to release the saddle in
the spacer bar groove.
If conduit is installed in a corner, ensure
that the spacer bar snap saddle is fitted
with release mechanism facing away
from corner.
Material
PVC-U is flame retardant and self-
extinguishing. It provides a 100%
recyclable material with good
sustainability.
Installation
Fitting
• Secure horizontal runs of conduit at a
maximum distance of 0.9m.
• Secure vertical runs of conduit at a
maximum of 1.2m.
• In areas of high ambient temperature
or where rapid changes in
temperature are likely, these
distances should be reduced.
• Where there are fittings or directional
changes, the conduit should be
secured approximately 150mm either
side to maintain support.
• Avoid over-tightening to permit
thermal movement.
Joints and couplers
• To accommodate thermal
movement on surface installations,
it is recommended that expansion
couplers be used at a maximum
distance of 6m intervals.
• In areas of high ambient temperature
or where rapid changes in
temperature are likely, this distance
should be reduced.
• To install an expansion coupler, coat
the inside of the short side with
solvent cement (MSC) and push
firmly over the conduit down to the
stop point.
• Slide the next length of conduit into
the long side of the coupler until
mid-way to the stop point. DO NOT
GLUE INTO PLACE. This will permit
expansion or contraction of the
conduit, providing it is free to move
in the saddles.
Bends
Care should be taken not to make too
tight a bend and attention is drawn
to BS 7671:2001 (Wiring Regulations)
CONDUIT
CONDUIT
CONDUIT
CONDUIT
EXPANSION
COUPLER
EXPANSION
COUPLER
LUBRICANT
SEALANT –MSC1
CONDUIT
SOLVENT
CEMENT –MSC20
PVC–U Conduit
SADDLE
SPACER
BAR
L
S
S
L
L
S
S
L
p214
Product
Information