


 226 / 320

3.27
Data is subject to errors and technical modifications.
Lighting, Connection
& Control
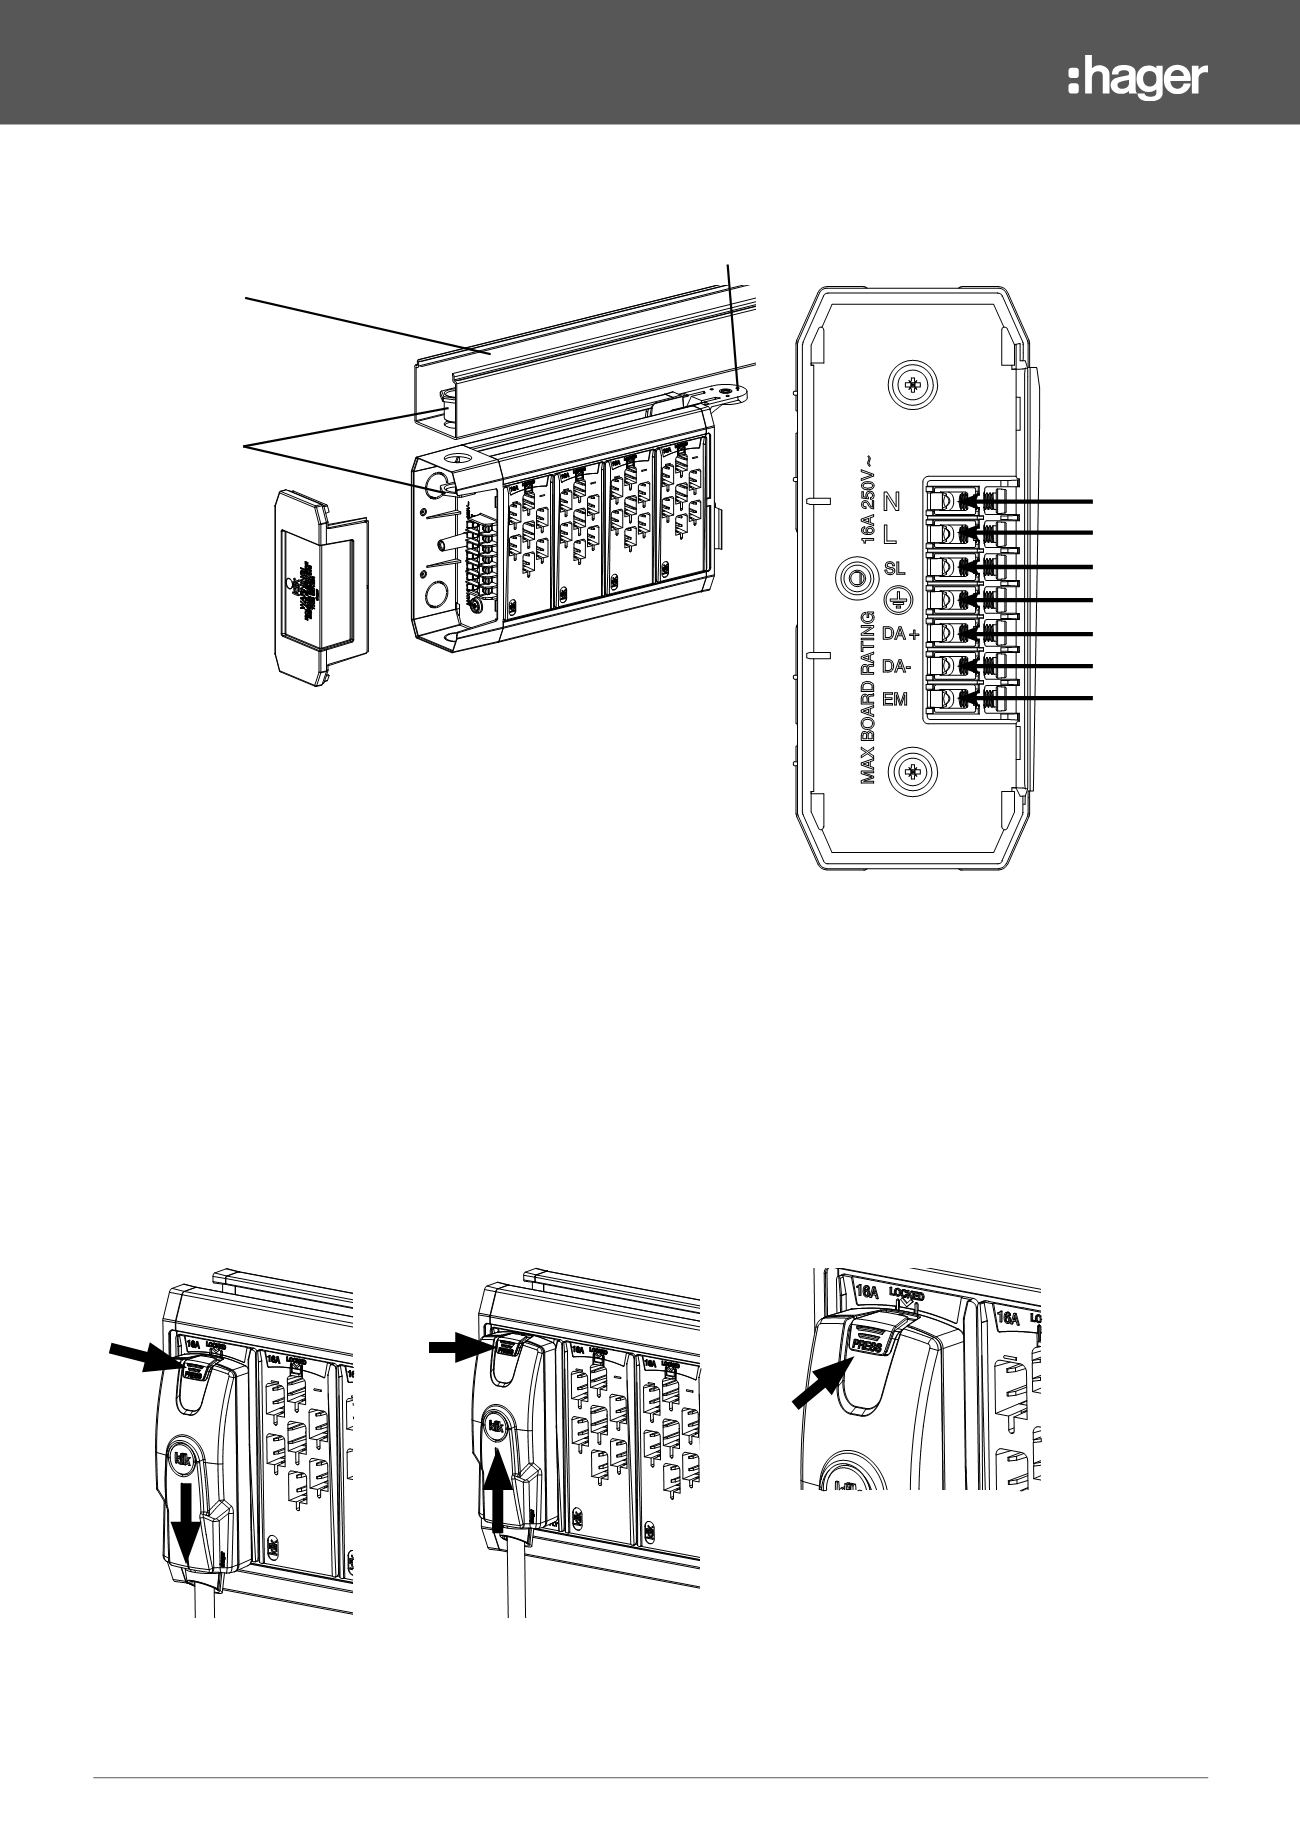
Klik 7 Pin
Mounting Methods, Connecting Plugs
Mounting Options for Trunking
Mounting Accessory can be clipped into the rear or top channel slot.
It can be easily removed by inserting a screwdriver in the RELEASE slot.
Fixed Wiring Connection
Klik 7 Pin LMB has seven screw terminals available to the installer and are
arranged in the end cap as per diagram. DA+/DA- connections can be used for
DALI/DSI control.
Making a Connection
To connect, locate plug in socket and
push down to connect and lock
To disconnect, press button to unlock
and push up to remove.
Plug type is identifiable by the colour
of the button
2.
2.
1.
1.
Neutral
Line
Switched Line
CPC
Data +
Data -
Emergency Line
White:
Luminaire Lead
Red:
Luminaire + Emergency
Black:
Link Lead
Blue:
Switching (OS, Wall)
Trunking
20mm Conduit Bush
& Lock nut
Use a machine screw and nut to
secure to trunking using Mounting
Accessory