


 102 / 576

102
PB500551-22
PB500552-27
PB500553-33
PB500555-33
PB500556-23
PB500554-24
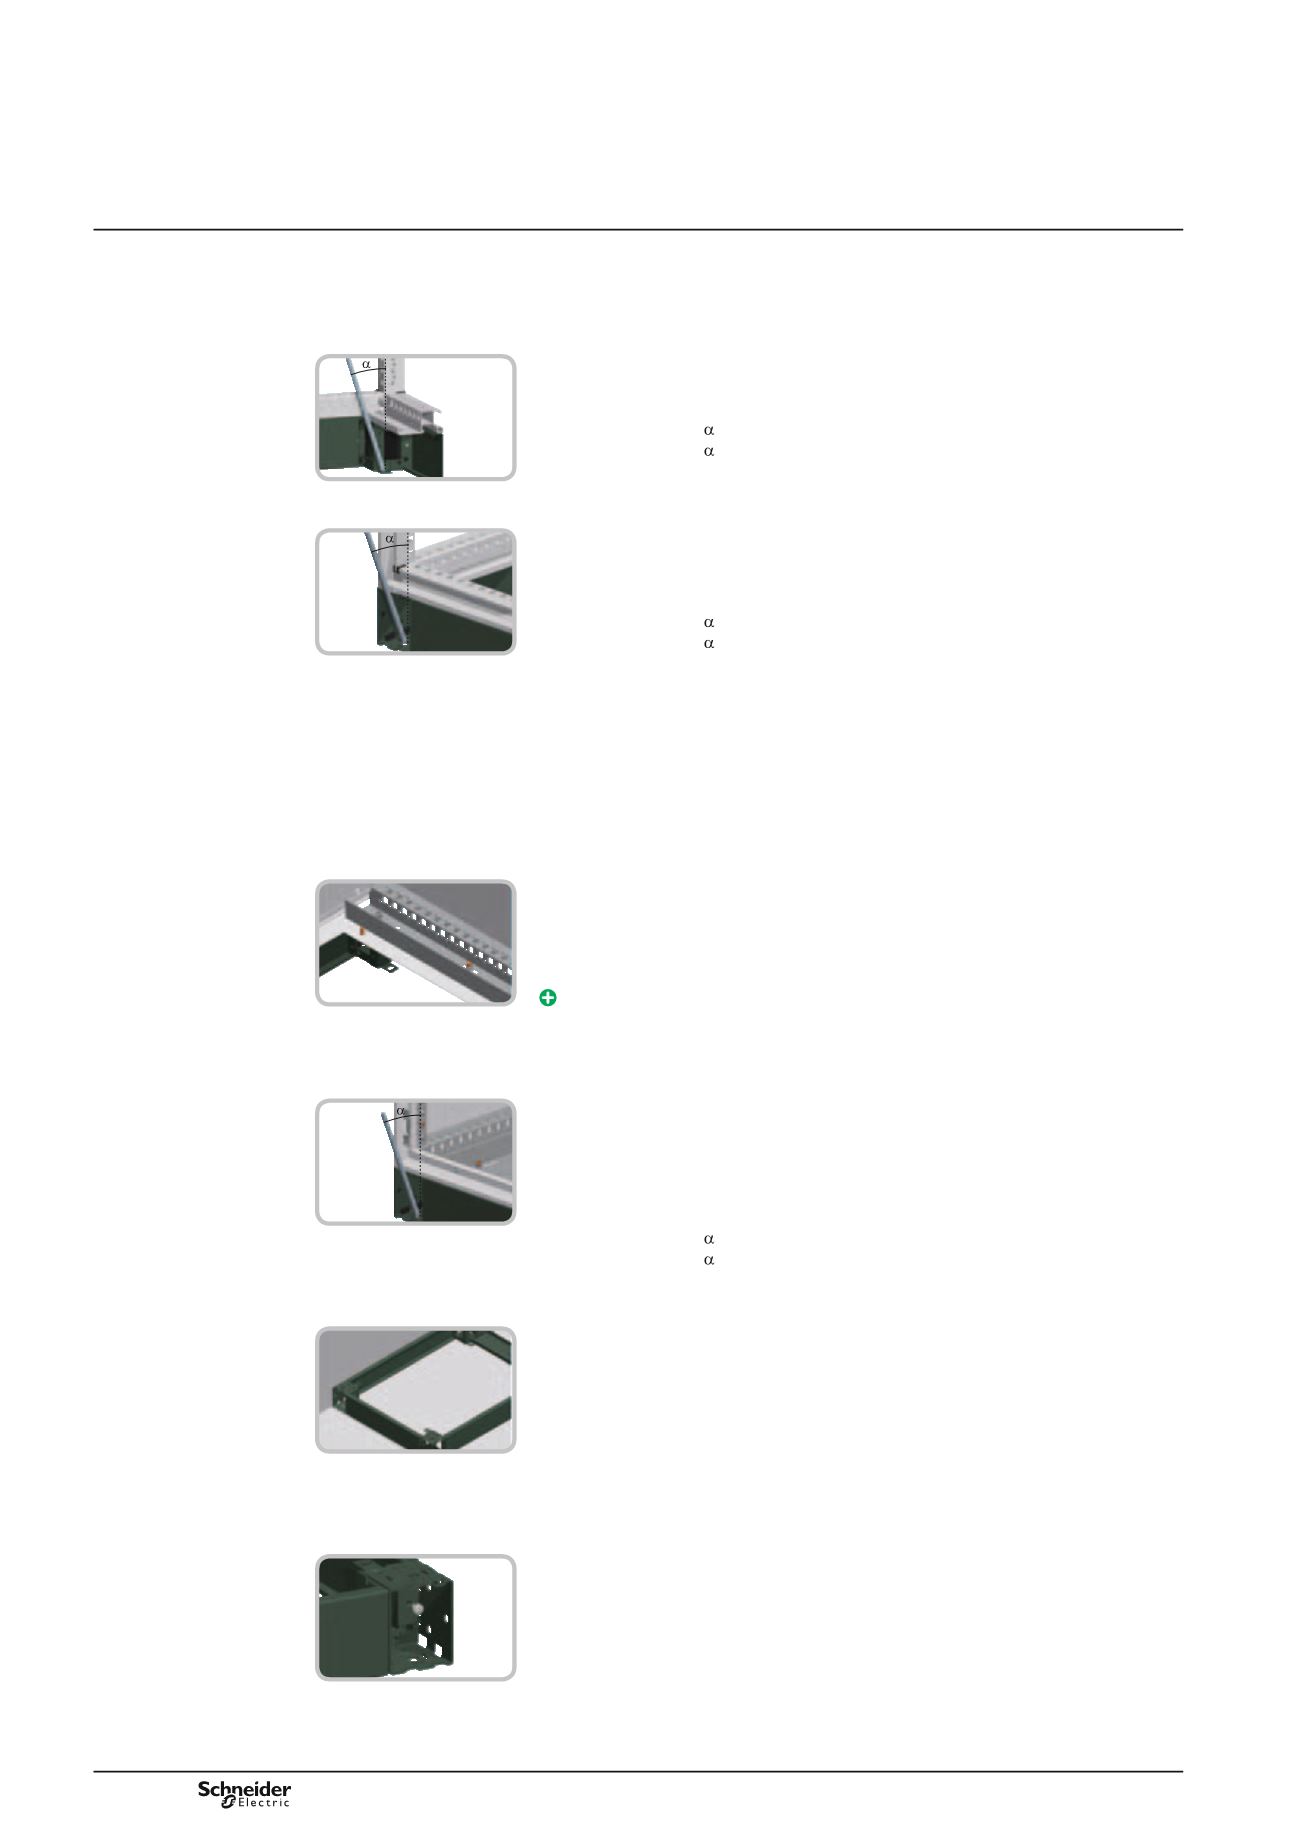
Possibility of fixing the plinth to the floor
1 -
Fixing from the inside of the enclosure.
The machining angle varies according to the plinth model:
Plinth height 100 mm = 18º.
Plinth height 200 mm = 9º.
2 -
Fixing from the outside of the enclosure, optimum point for the rigidity
of the assembly.
The machining angle varies according to the plinth model:
Plinth height 100 mm = 22º.
Plinth height 200 mm = 11º.
3 -
It is also possible to use floor-fixing supports, reference
NSYSGF
, to fix
the corner or the panel and the corner to the floor.
The corners of the ends can be rotated in the event of needing to remove the side
panels of the plinth and/or to obtain access to the fixing outside the floor,
when the set is installed against the wall.
Floor
Fixing the enclosure to the plinth
Fixing from the inside of the enclosure by means of an M12 screw, screwing directly
into the corner of the plinth.
Fixing convenience and speed.
Fixing the enclosure to the ground
Fixing from the outside of the enclosure, optimum point for the rigidity
of the assembly.
The machining angle varies according to the plinth model:
Plinth height 100 mm = 22°.
Plinth height 200 mm = 11°.
Enclosure against a wall
Thanks to the design of the corners, when the enclosure is installed
against the wall, the following is possible:
b
b
to remove the side panels (turning back corners),
b
b
to access the external fixing to the floor.
It is also possible to use floor-fixing supports, reference
NSYSGF
,
to fix the corner or the panel and the corner to the floor.
Assembly of the plinth panels
The panels are fixed with an M6 screw to the corner, included
in the standard supply of the side panels.
The front and rear panels are delivered mounted on the corners.
Spacial SM- SF
Steel floor-standing enclosures
Accessories